
Why Proper Planting Matters
When we receive a call to come look at a young to medium-aged tree that is struggling, the number one issue we see is incorrect planting.
Unfortunately, we aren't often called until the problem is sever and there is little we can do other than recommend starting over.
Incorrect planting often causes tree mortality 15-20 years down the line - just when the tree is starting to mature.
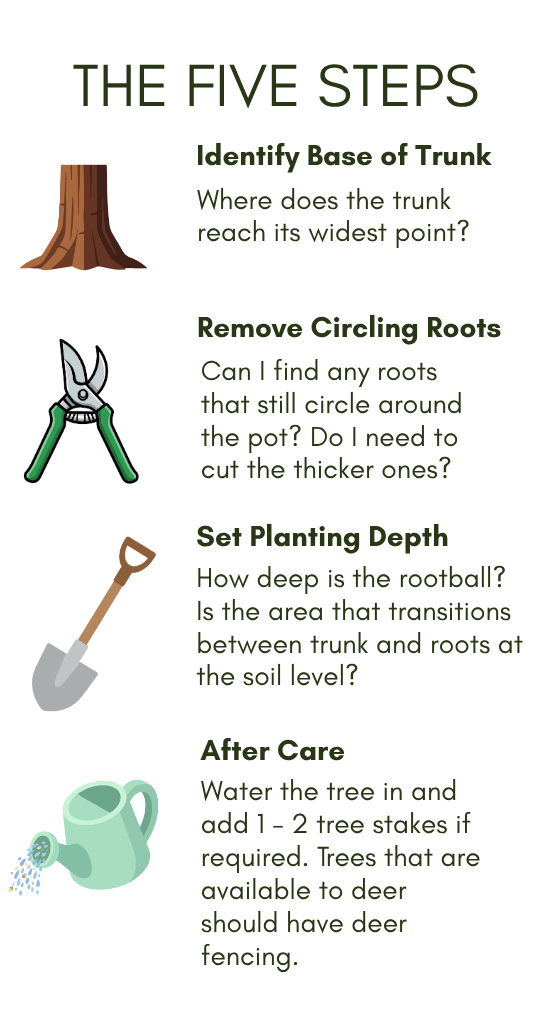
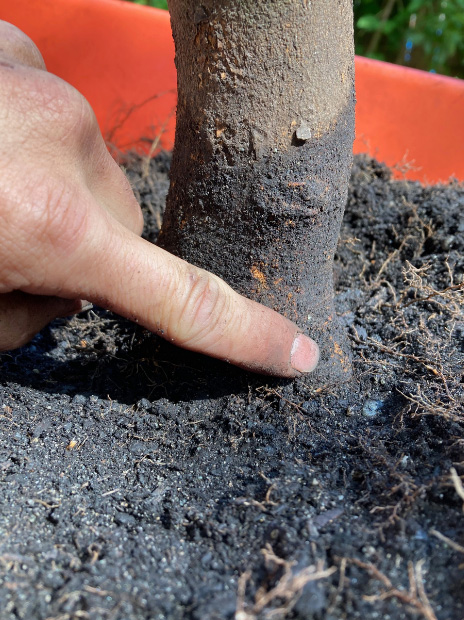
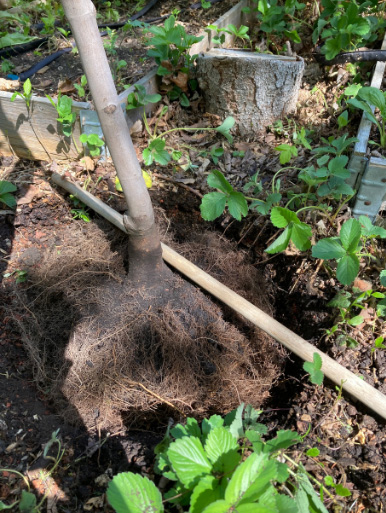
Step 1 - Find The Base Of The Trunk
- Remove the top layer of soil until you find the root flare.
- The root flare is the widest part of the trunk.
- Major roots should be visible.
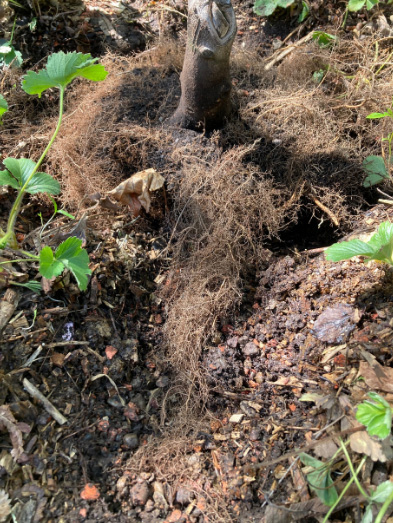
- Do not confuse the graft for the root flare
- The graft is where the trunk is 'welded' onto the base
- The graft should not be buried under the soil
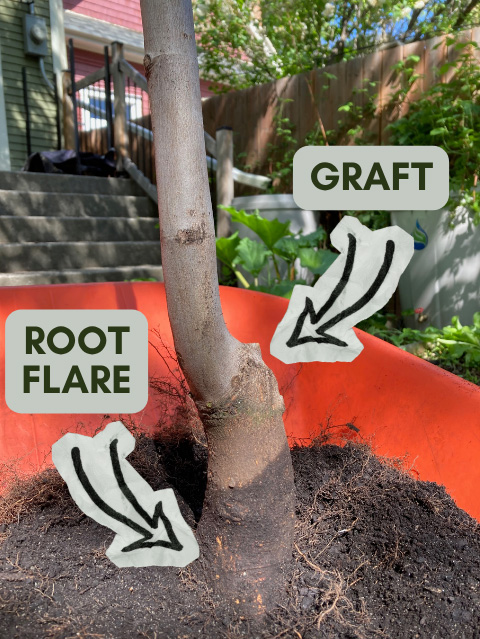
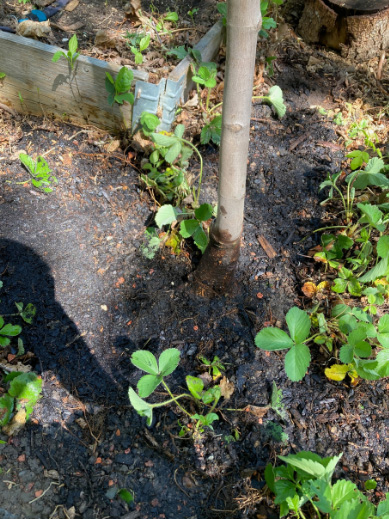
A tree's trunk is not able to survive long term under the soil. Moisture will cause the bark to rot and roots can grow in the surrounding soil and strangle the trunk.
Do not plant a tree straight out of the pot without determining where the trunk ends and the roots begin.
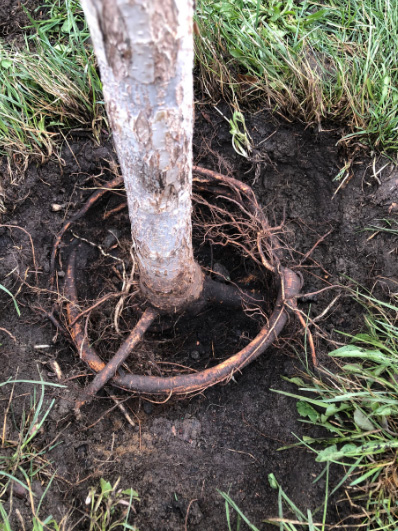
Step 2 - Removing Circling Roots
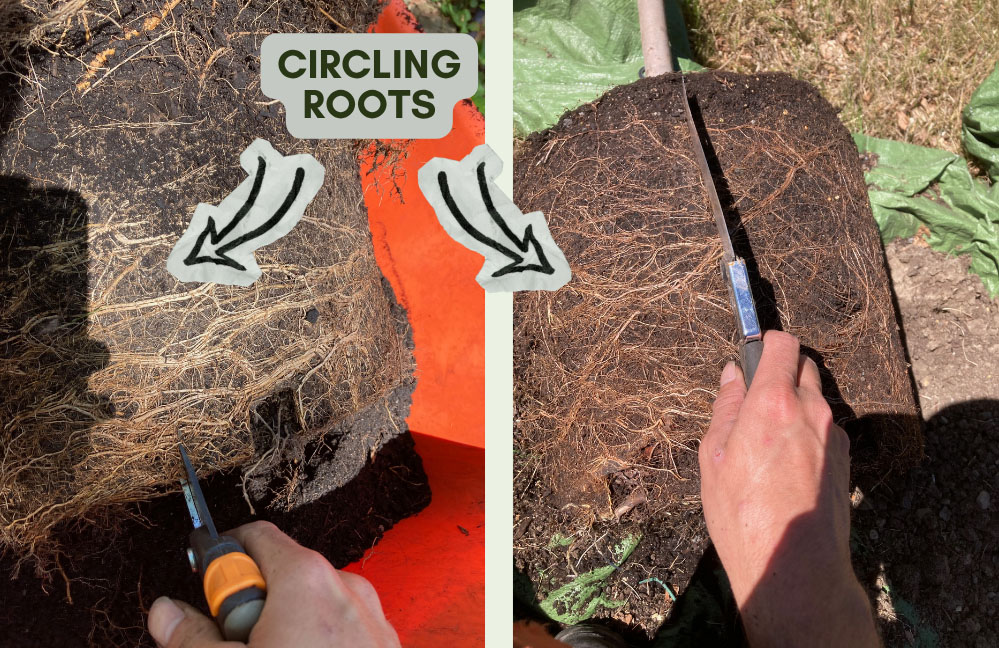
- Use secateurs or a folding saw to cut circling roots. Check for large circling roots around the trunk.
- It works well to cut all four sides of the root ball with a saw and then pull all of the roots loose.
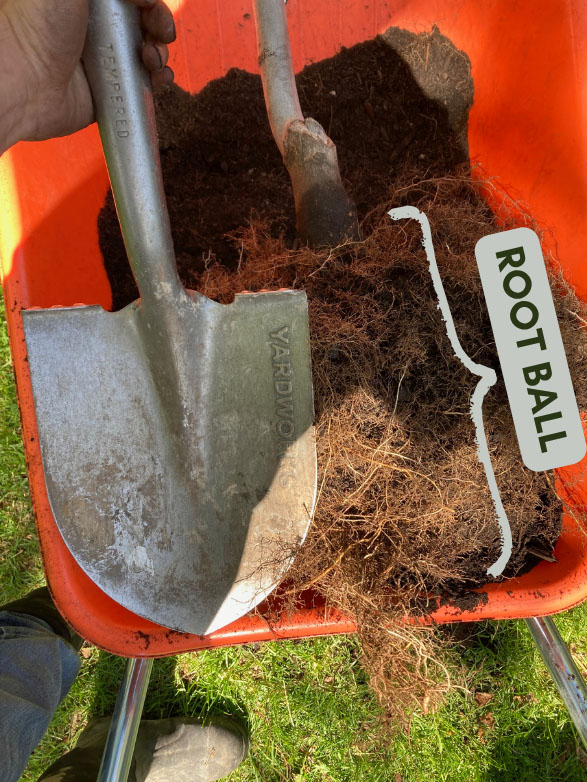
- The root ball may be much smaller now - about the depth of a space for 10-gallon potted stock
Step 3 - Set Planting Depth
- The root flare should be level with the ground.
- Remember how the root ball is roughly the depth of a shovel? Start by digging no deeper than one shovel depth.
The hole should be at least 1.5 times the width of the rootball and no deeper than the rootball.
- Lay the shovel across the planting hole as a quick depth check.
- Make sure long fibrous roots extend out from the planting hole.
- Backfill with native soil; resist the temptation to use amended soil.
- Gently water in the tree to moisten the roots, remove air pockets, and settle the soil.
Step 4 - After Care
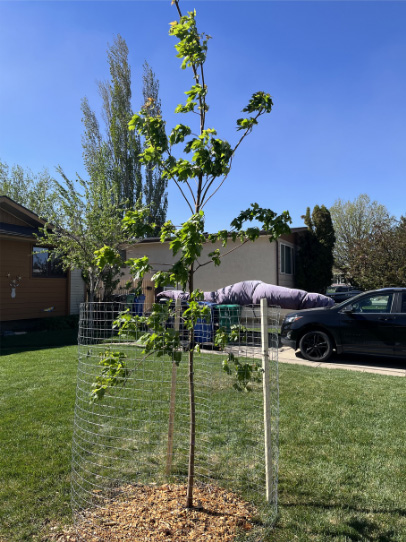
- Apply 2 to 4 inches of organic around the planting area, without piling it around the trunk.
- Support systems such as tree stakes can be added only if needed.
- Any tree tether should be wide and not too tight.\
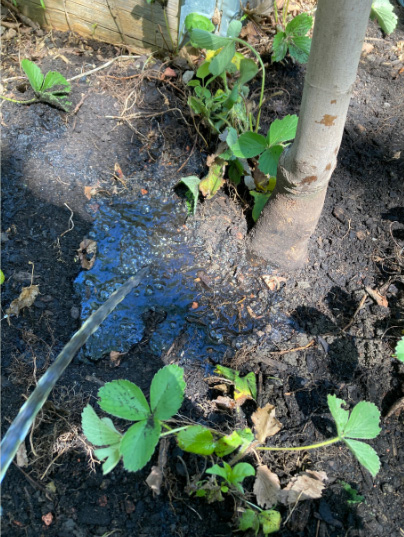
- When watering, the entire rootball should be saturated (Imagine one foot down)
- Use a low-velocity open flow on a hose or the shower setting on a spray head. Avoid reliance on sprinklers.
Watering Shedule
- First 2 weeks: Water Daily
- First 2 Months: water every 2-3 days
- After two months: water weekly, ensuring the root area drains but is still moist
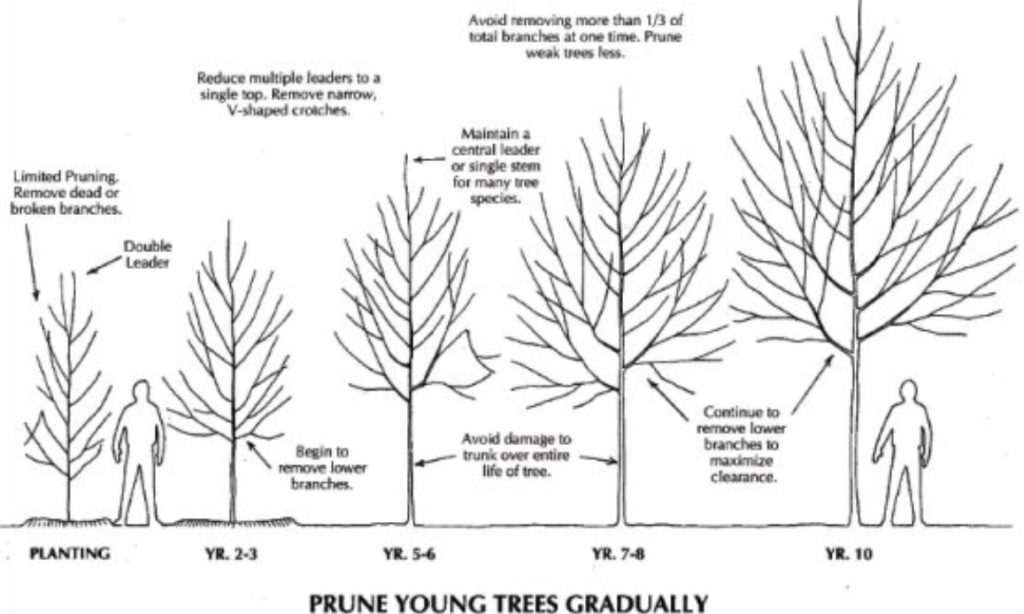
- Trees should be lightly pruned at plating so that there is one clear central leader.
- Nursery trees typically require structural pruning every 3 years for the first 10 years of life.
- Call a qualified arborist if your unsure on pruning.
We are a tree service based in Lethbridge, Alberta with a passion for helping yound seedlings grow into beautiful mature trees.
Our team is made up of ISA Certified Arborists.
You can find us swinging from trees, digging in the dirt, or going for slow weekend walks around the neighborhood looking really close at bark!
If you want to learn more or get a quote, get in touch with us here